#1 - The saddle
The height, tilt, and forward or backward position of the saddle have a major impact on the health of your back and knees. A saddle that is too high can cause the pelvis to sway side to side or make you lean too far forward, putting unnecessary stress on the discs of your spine. A saddle that is too low increases pressure on the knees and reduces pedaling power. The position of your back and pelvis is also affected if the saddle tilts toward the handlebars or toward the rear wheel. Finally, a saddle that is too far forward increases pressure on the knees, while one that is too far back reduces pedaling efficiency.
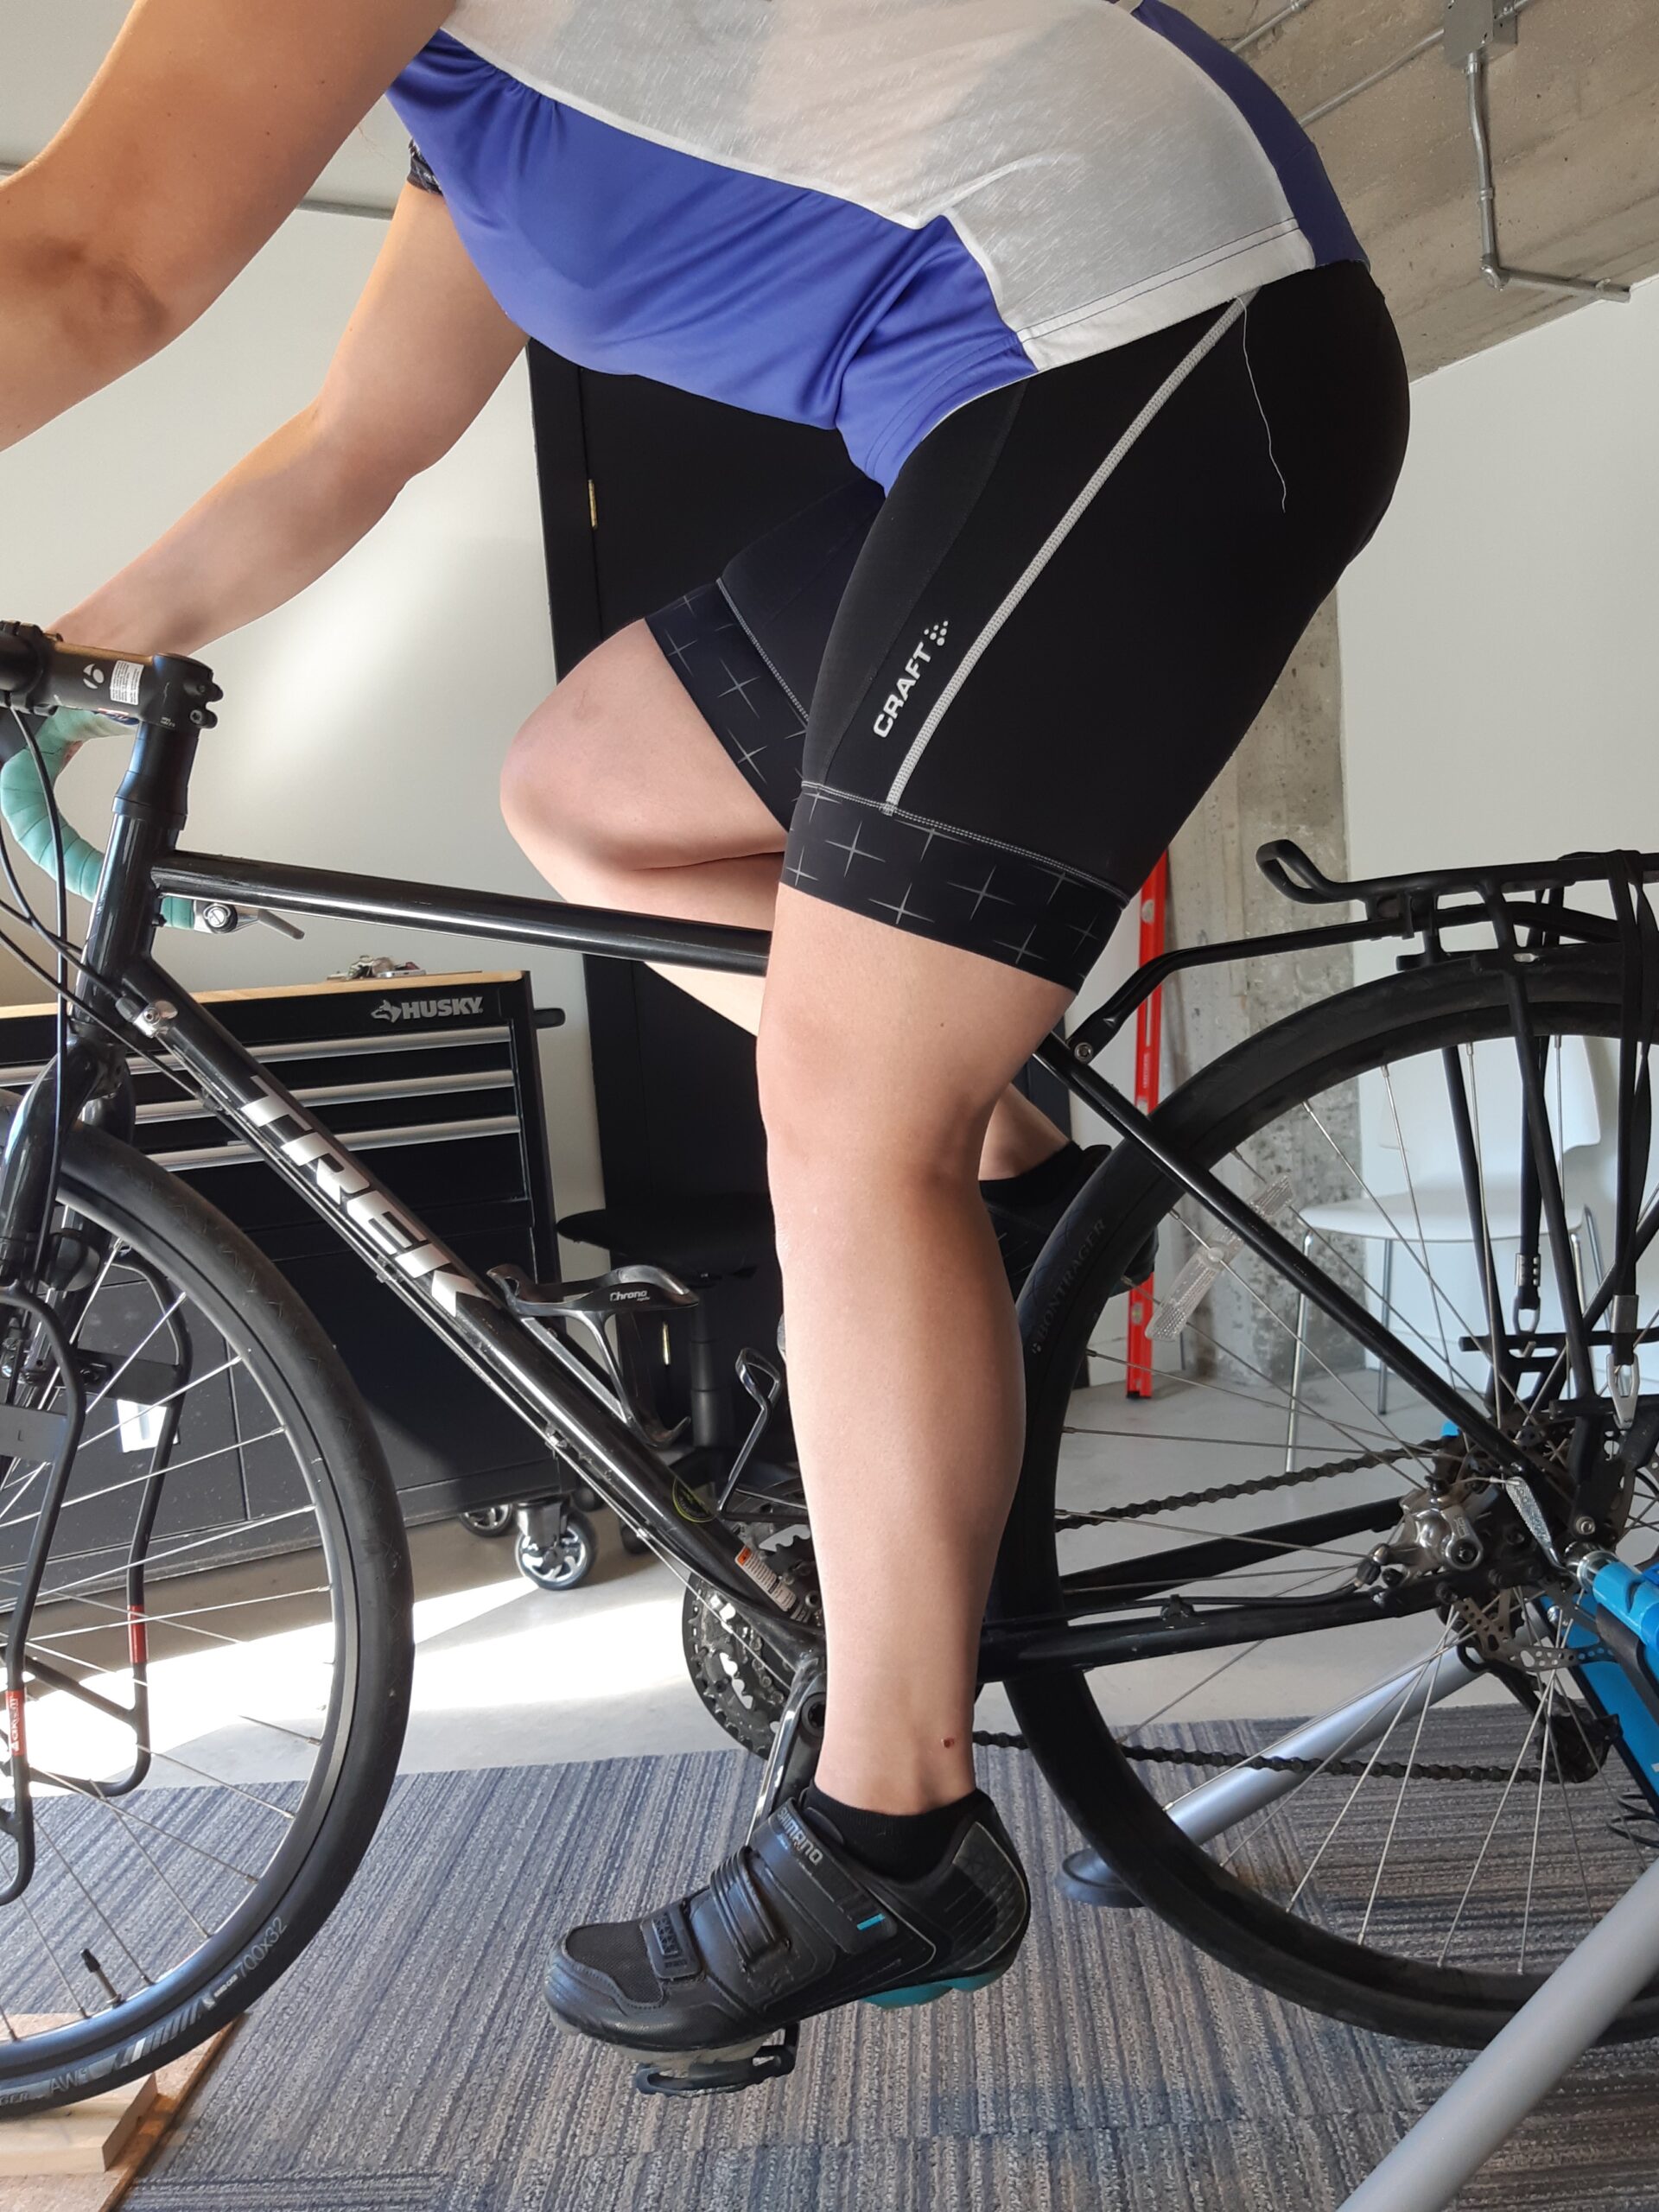
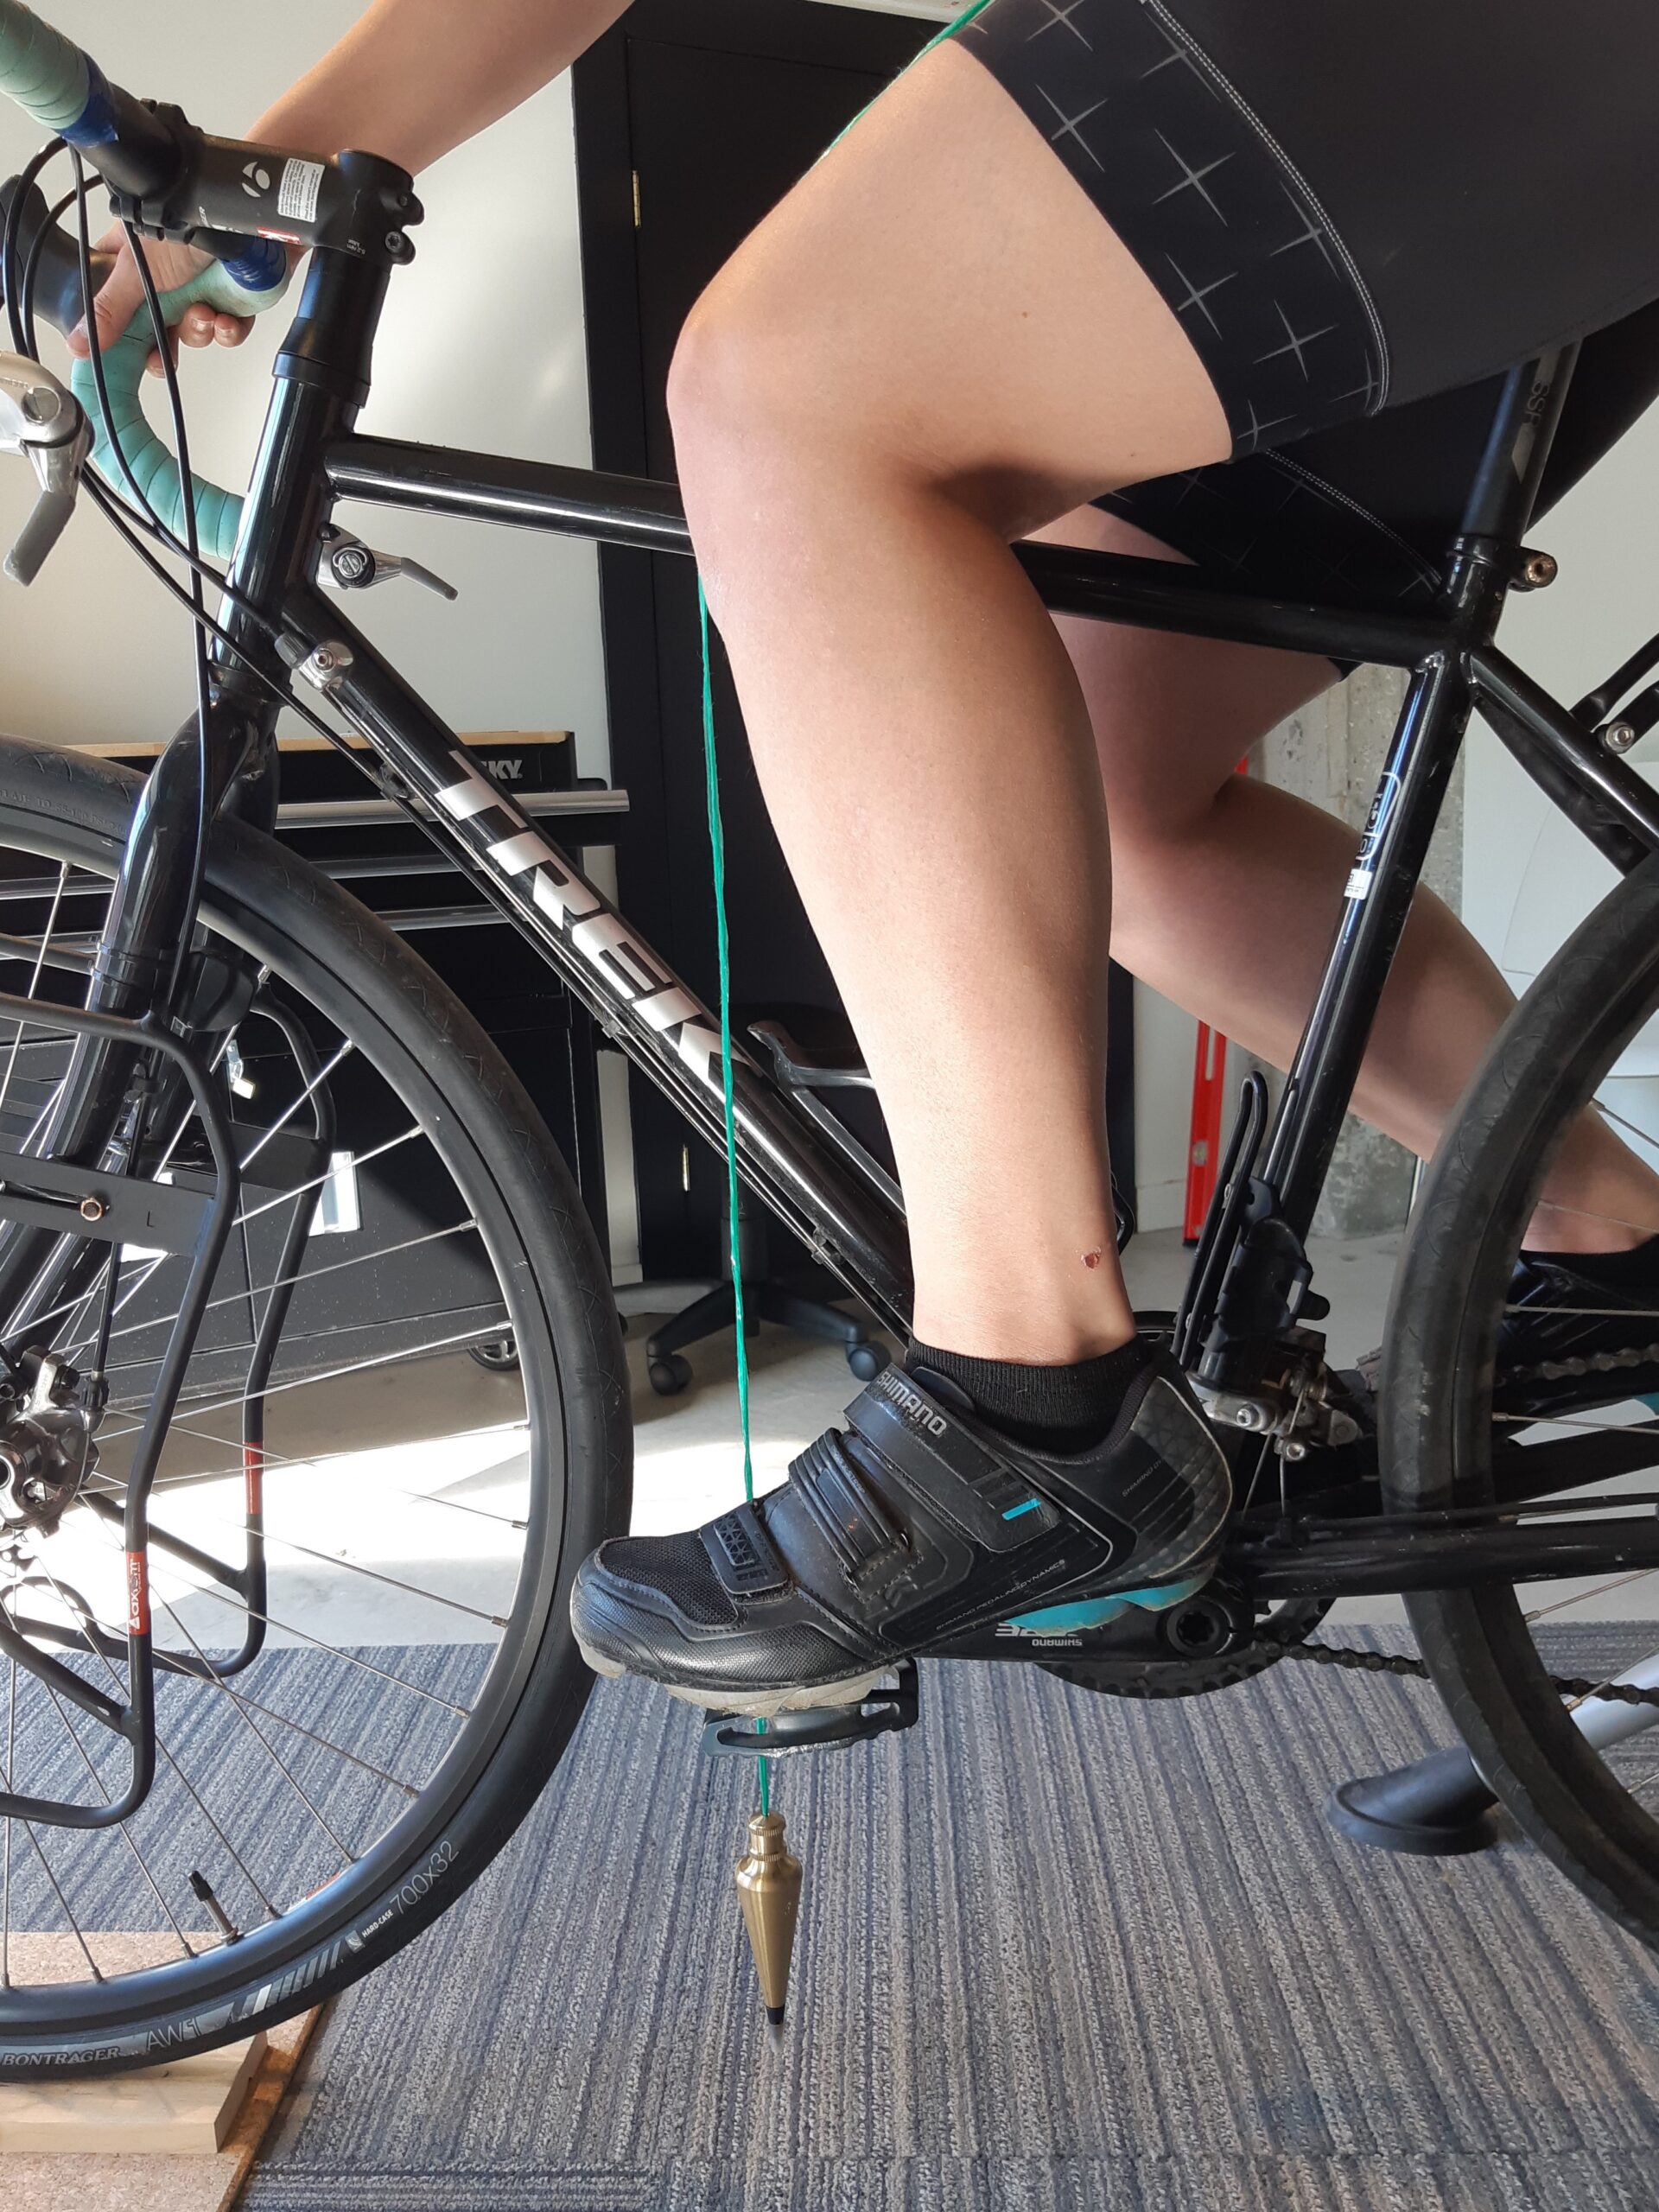
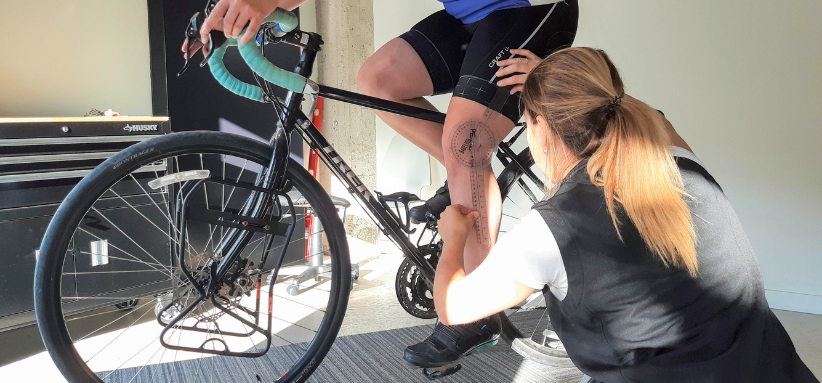
Adjustment to make: position the crank at its lowest point and sit on the saddle with your hands on the handlebars. When the ball of your foot rests on the pedal, your knee should be slightly bent (between 30 and 35 degrees). For most cyclists, the saddle should be horizontal or very slightly tilted forward.
Next, position the crank horizontally and forward, still with your hands on the handlebars. The tip of the kneecap should be directly above the pedal axle (the point where the pedal attaches to the crank arm). To check, use a string with a small weight at the end. Holding the string at the tip of the kneecap, adjust the saddle position so that the string passes directly over the pedal axle.
#2 - The handlebar
The height of the handlebar affects the amount of stress on the lower back. The higher the handlebar, the more upright the position, which increases the weight supported by the buttocks. An overly upright posture can increase stress on the spinal discs due to repeated road vibrations. A handlebar that is level with or slightly lower than the saddle helps distribute weight between the upper and lower body, reducing stress on the spine. If this position is new for you, it may take some time to feel comfortable, and that’s completely normal.
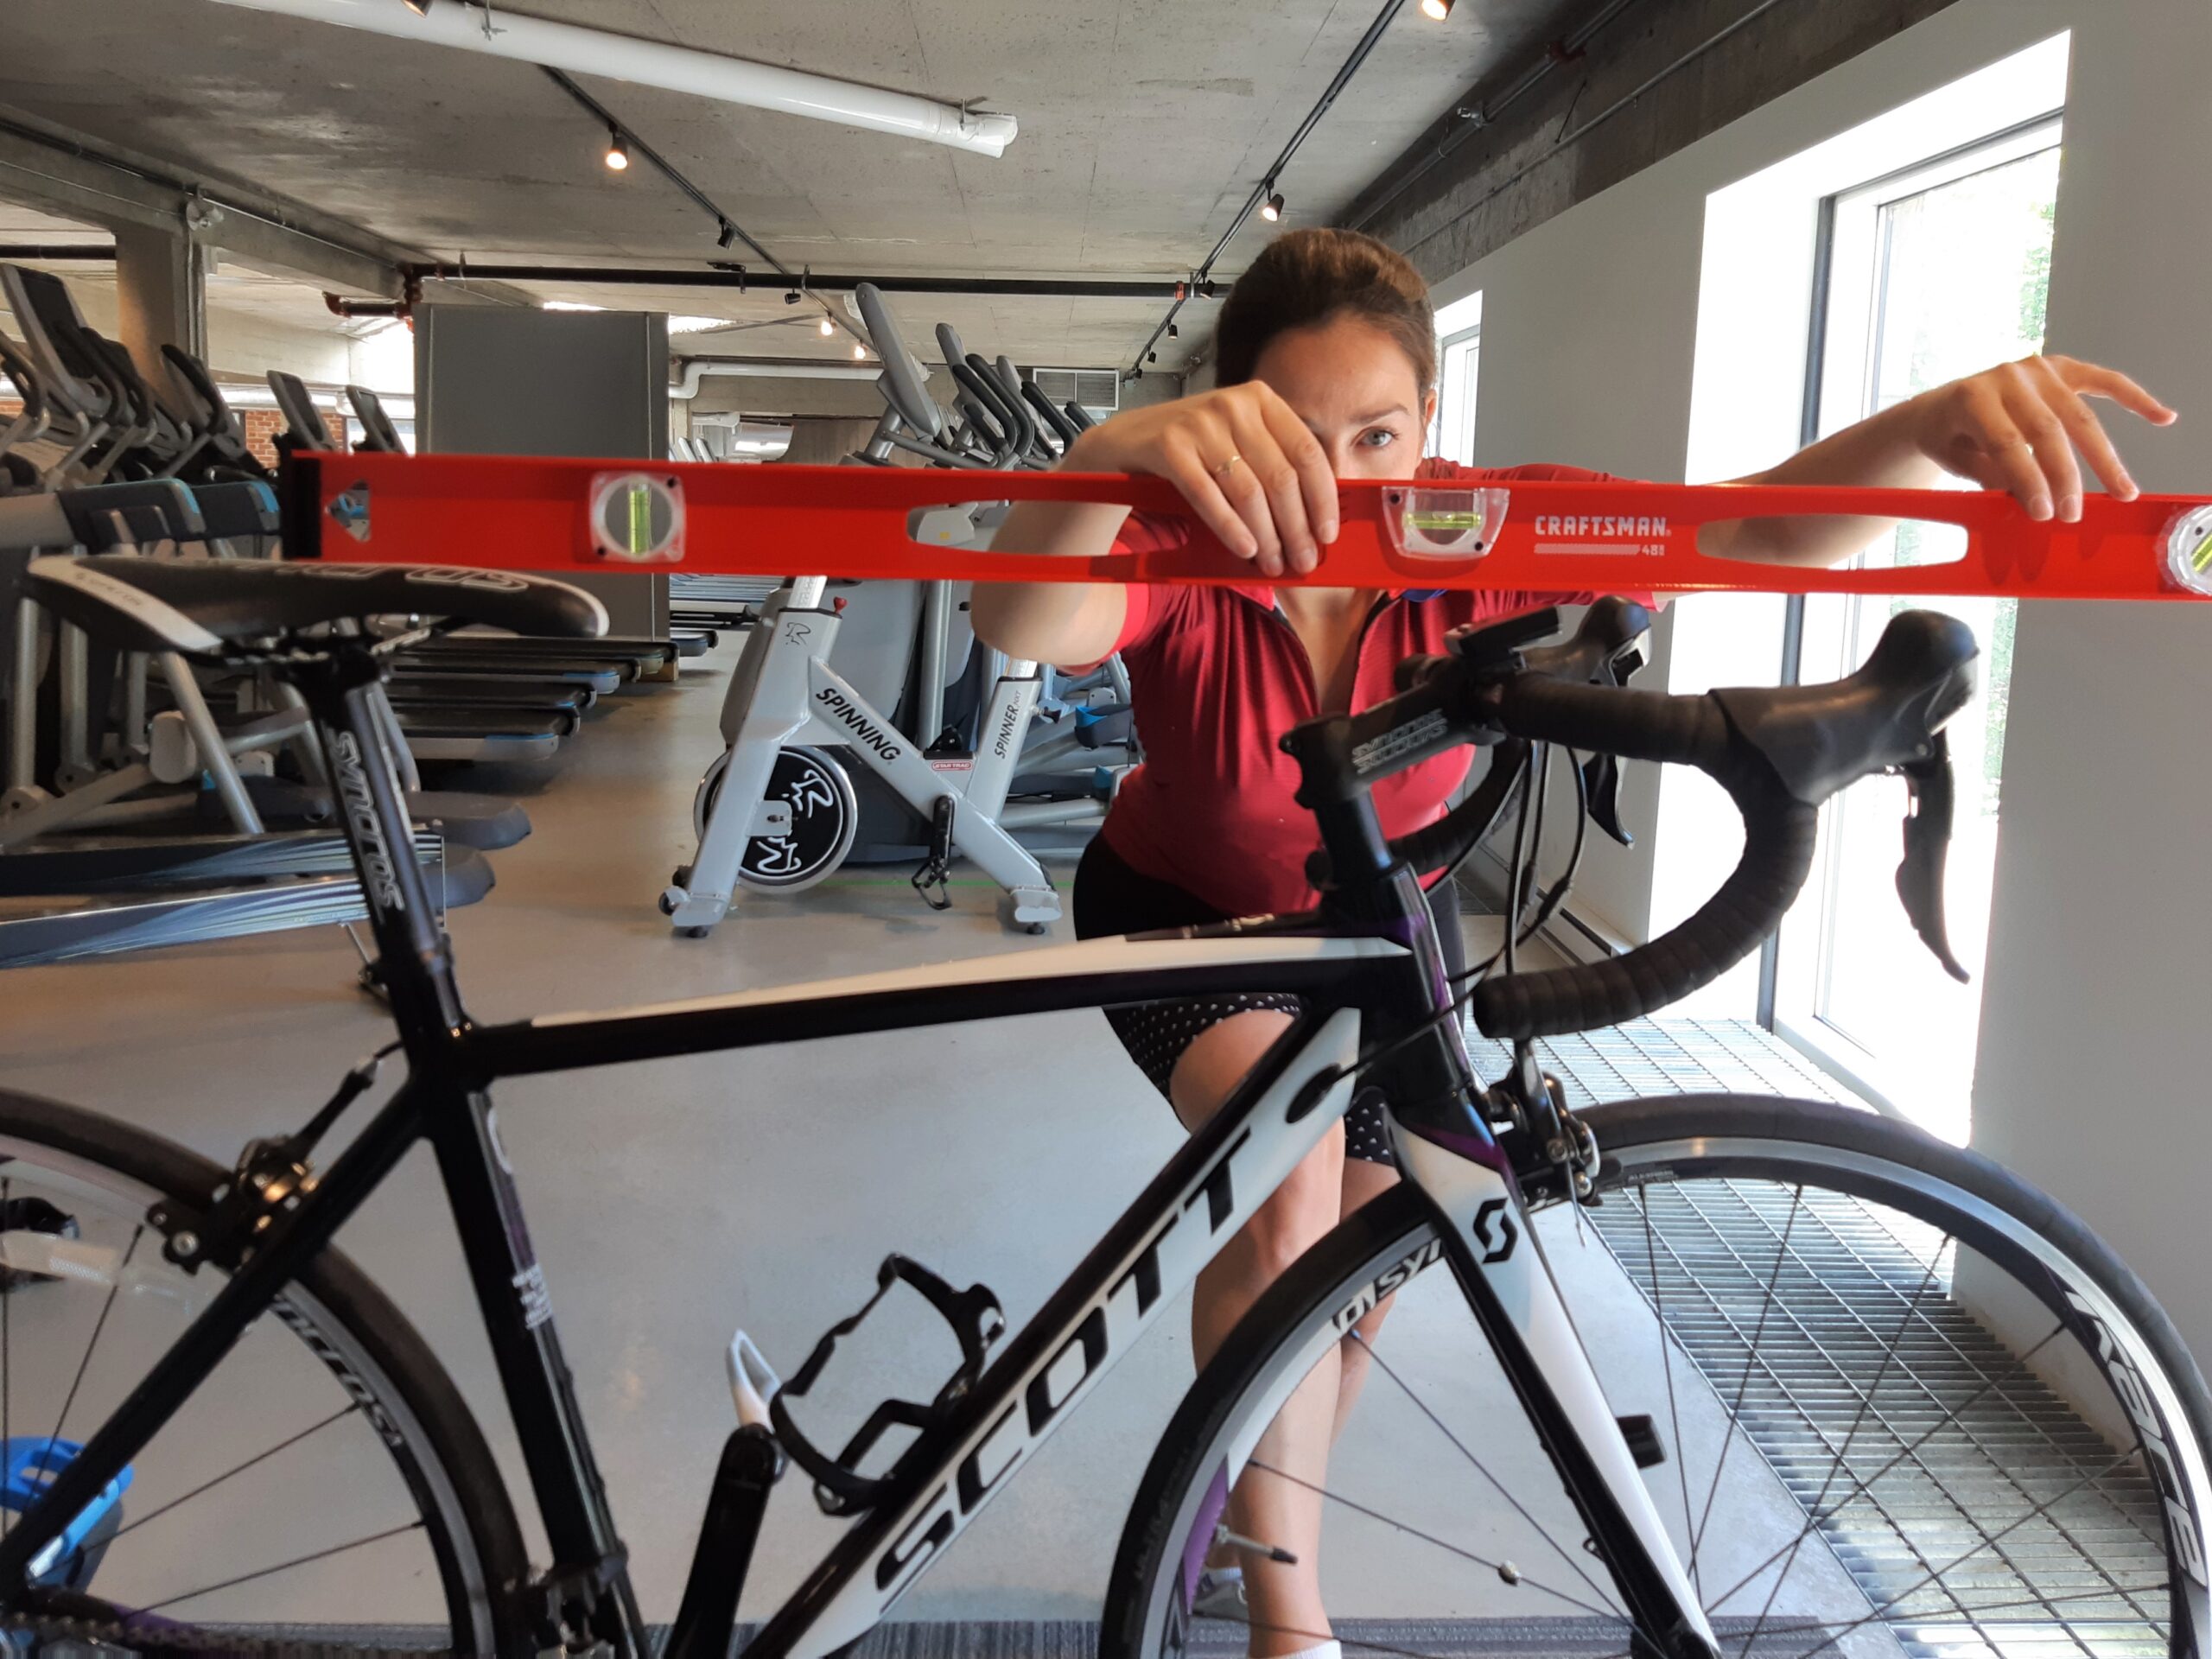
Adjustment to make: using a level placed horizontally on the saddle, measure the vertical distance between the saddle and the handlebar. For recreational cycling, position the handlebar between 0 and 50 mm lower than the saddle. For trained cyclists, aim for 50 to 90 mm lower. An urban position, with the handlebar higher than the saddle, is recommended for short, occasional rides (less than 30 minutes).
#3 - The ideal posture
Even with a properly adjusted bike, it is important to make a conscious effort to maintain good posture and healthy habits while riding.
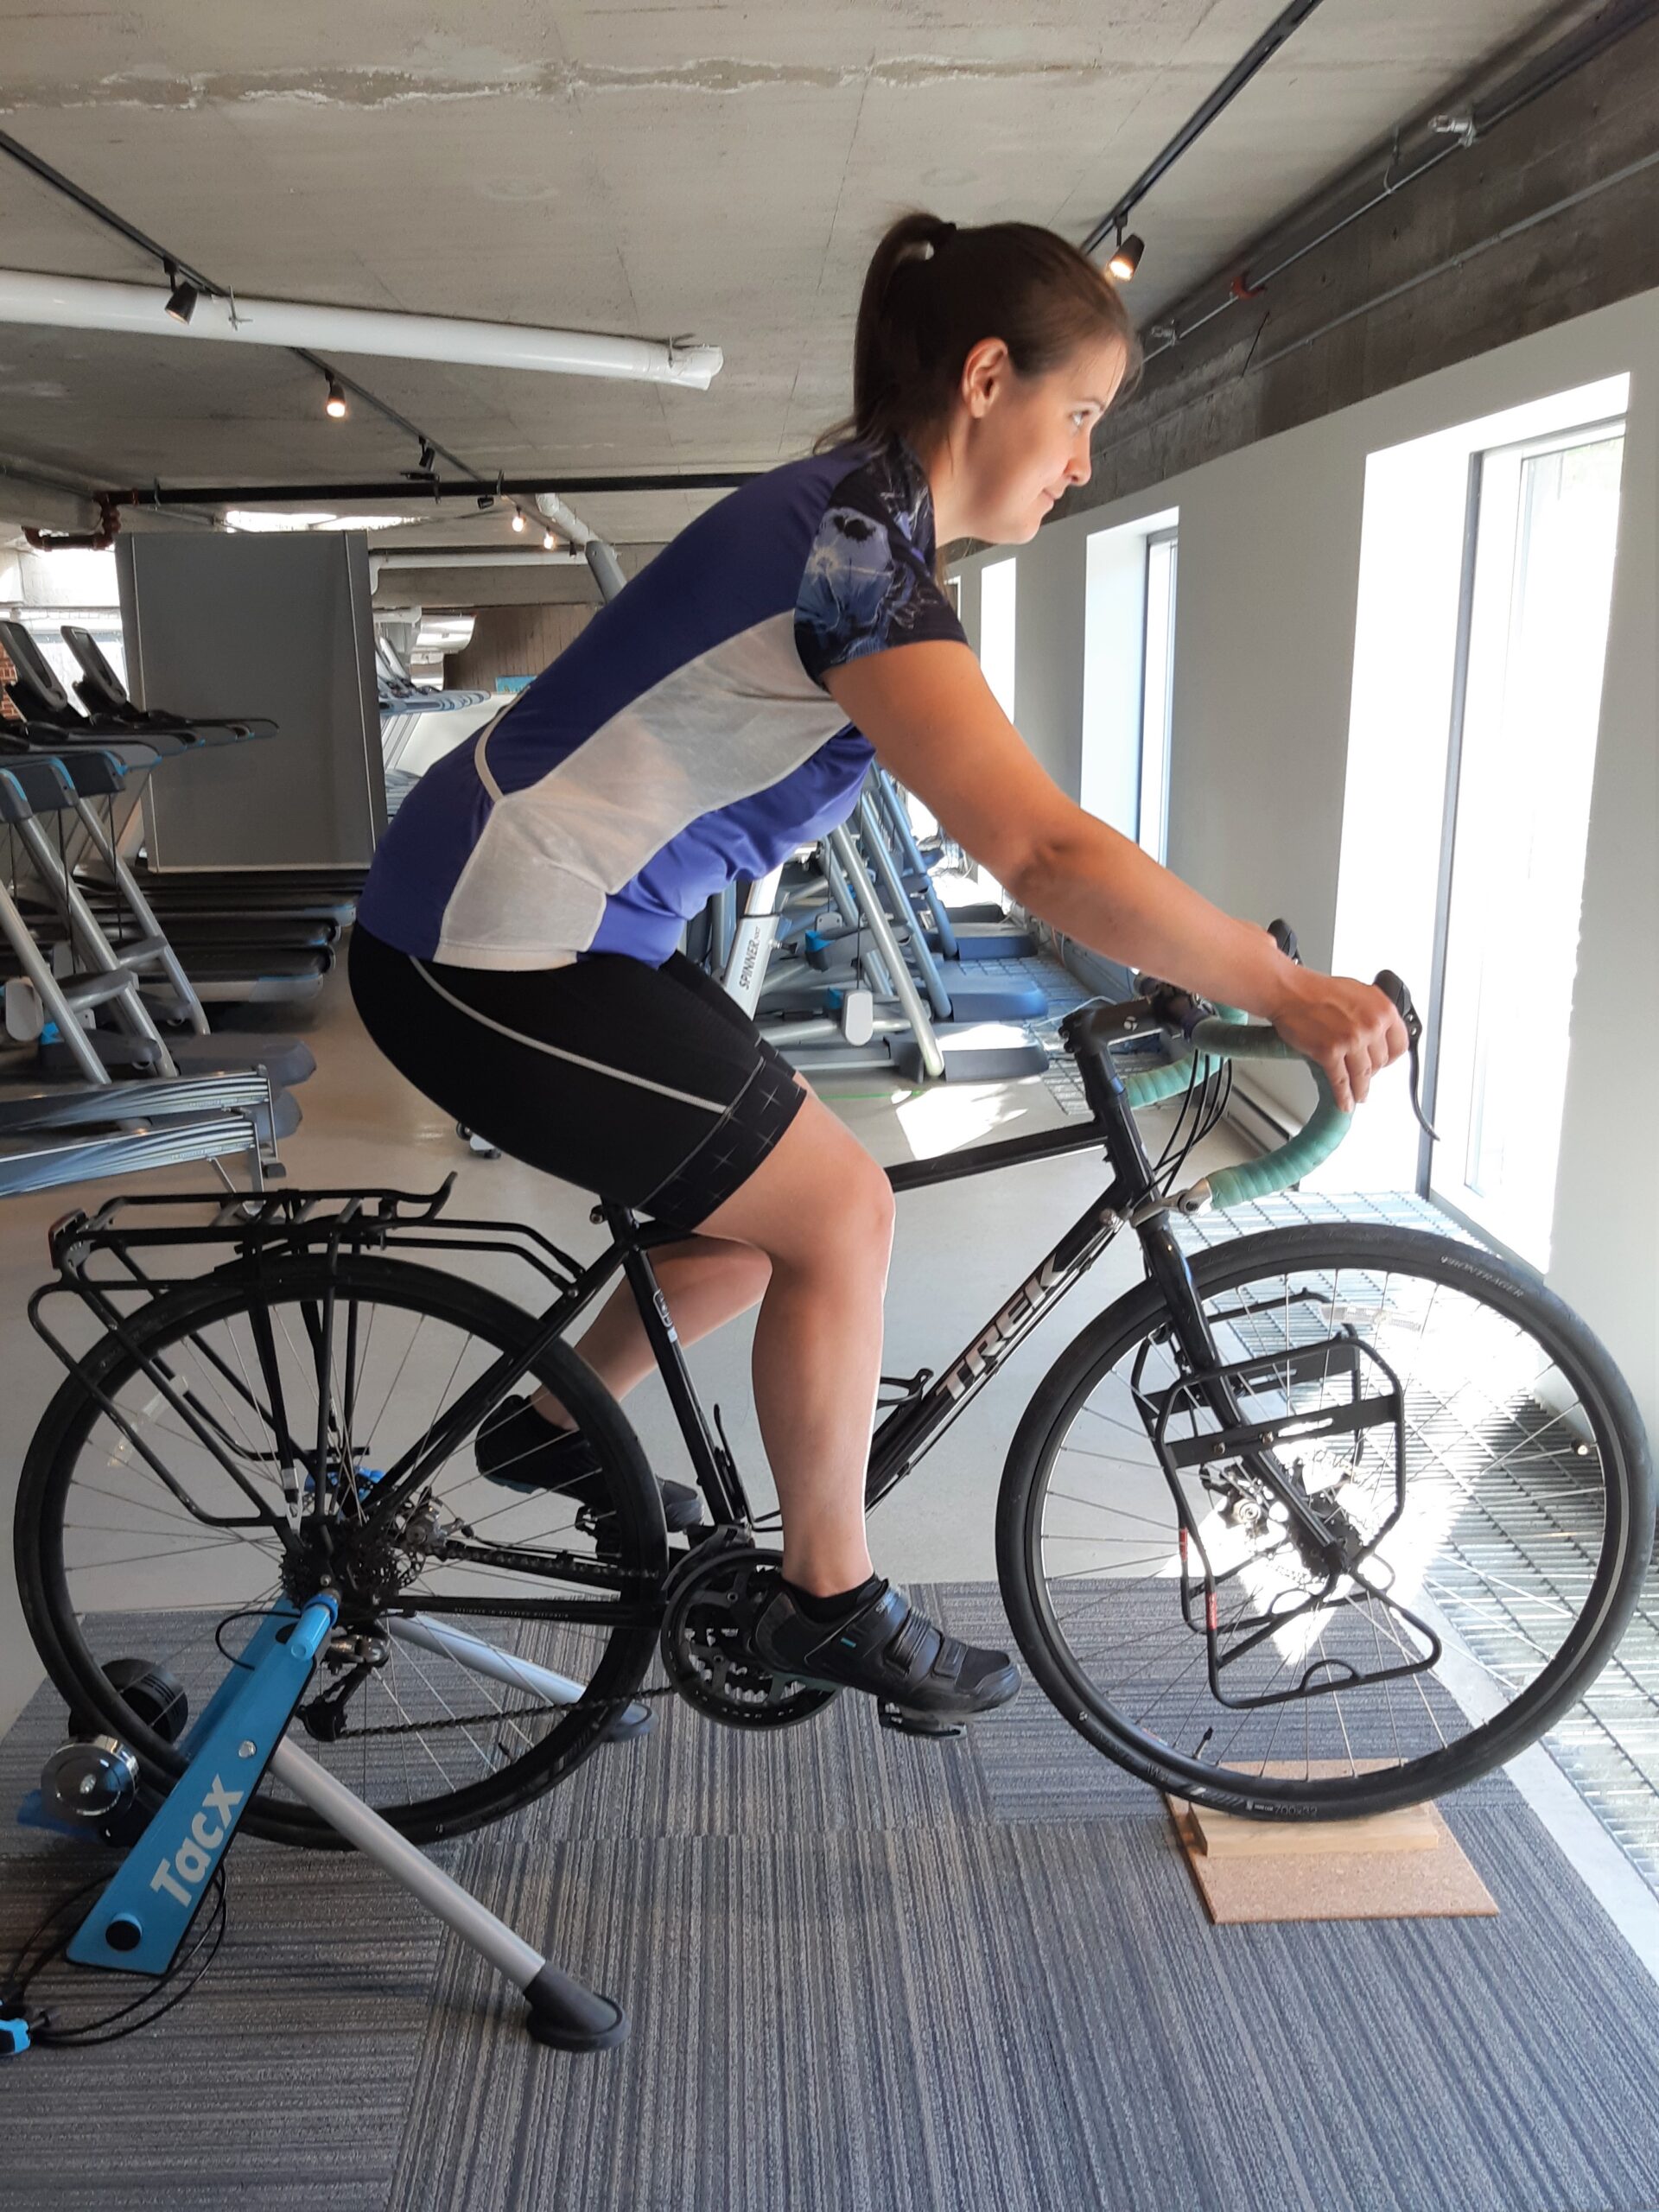
Ask another cyclist to observe you from the side on your bike: Is the back of your neck overly arched? Is your lower back rounded?
The goal is to keep your neck and back straight with a gentle curve in the lower back. Your elbows should be slightly bent.
Changing your hand position on the handlebars and straightening your back from time to time helps redistribute pressure and rest your joints. Prolonged positions can irritate the body, so remember to take breaks to allow your body to return to a vertical posture.
Finally, congratulate yourself for adopting a more active lifestyle. By taking these precautions, you greatly increase your chances of cycling without pain.
Enjoy the ride… and don’t forget your helmet!
Did you know? We offer a bike fitting and assessment service for cyclists of all levels.